BUCKEYE EXPRESS EMAIL LOGIN
BUCKEYE EXPRESS EMAIL LOGIN
Buckeye Mail is an email service offered by Broadband as a personal Email service that is affordable to internet users. With incredible features, that include spam filtering, and a mobile app with an intuitive interface, Buckeye Mail offers one of the best email services available in the market.
Like many other similar service providers, Buckeye Mail Login sometimes malfunctions, and trying different solutions might be time-consuming. This is why we have made this post to help you make Buckeye Mail login effortless, thereby handling different scenarios of issues you may likely run into as you use the Buckeye Email. This post contains a separate section for Buckeye login issues troubleshooting where several unresolved problems are tackled. The section also equips you with a lot of relevant information that may help you understand Buckeye email login even more.
Manual set up of Buckeye email login on Android smartphone
Download the Buckeye Android application from Play Store, install it, and launch the app as the installation completes.
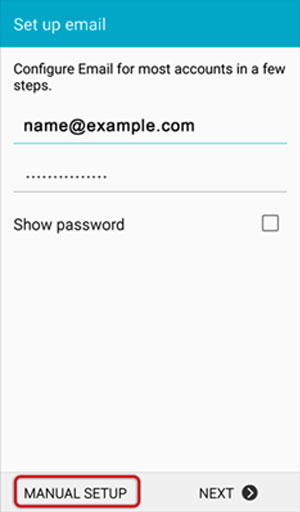
As the app opens up, begin the setup process by providing the email address and email password. Then click on the Manual Setup button seen at the bottom left corner of the screen.
- The next screen asks for the email account type. Select POP.
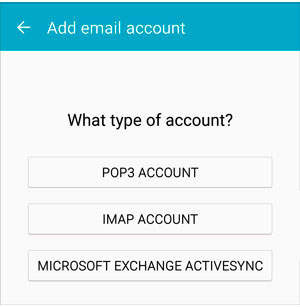
- The followings are the settings parameters to be entered for the POP account type chose in the previous screen.
- POP Server: mail.bex.net
- Security type: None
- Port: 110
- Secure Port: 993, Security Type: SSL/TLS (Accept all certificates)
- Insecure Port: 110, Security Type: None (Accept all certificates)

- Now setup the outgoing messages SMTP settings as given below:
SMTP Server: mail.bex.net
Security type: None
Port: 2
The general outgoing messages SMTP port settings are as follows:
- For Outgoing (SMTP) Secure Port 465: Security Type: SSL/TLS (Accept all certificates)
- Outgoing (SMTP roaming server) Secure Port 587: Security Type: SSL/TLS (Accept all certificates)
- Outgoing (SMTP) Port 25: Security Type: None (Accept all certificates)
- Outgoing (SMTP roaming server) Insecure Port 587: Security Type: None (Accept all certificates)
- Hit the Next button after filling in the required fields with the information given above.
The next step is to update the account options. You would get to this screen if you had hit the Next button in the previous one. Here are the points to note about the account options.
Email Checking Frequency: You can use this to set how often you would like your device to refresh and check for new emails. You need to be aware that the more often your device checks for new emails, the faster its battery gets drained.
Notify me when email arrives: By checking this box, the app will often notify you as new email messages come in.
See: Domestic Rv Refrigerator Troubleshooting
Sync email from this account: By checking this box, the app will often check for emails automatically.
- Click on Done in the new screen and that is all.
Your Buckeye Email Android app is all setup and ready for use. You can now start using the app to send and receive email messages effortlessly.
Manual set up of Buckeye email login on iOS
- Find your way to the phone Settings and click on Mail.

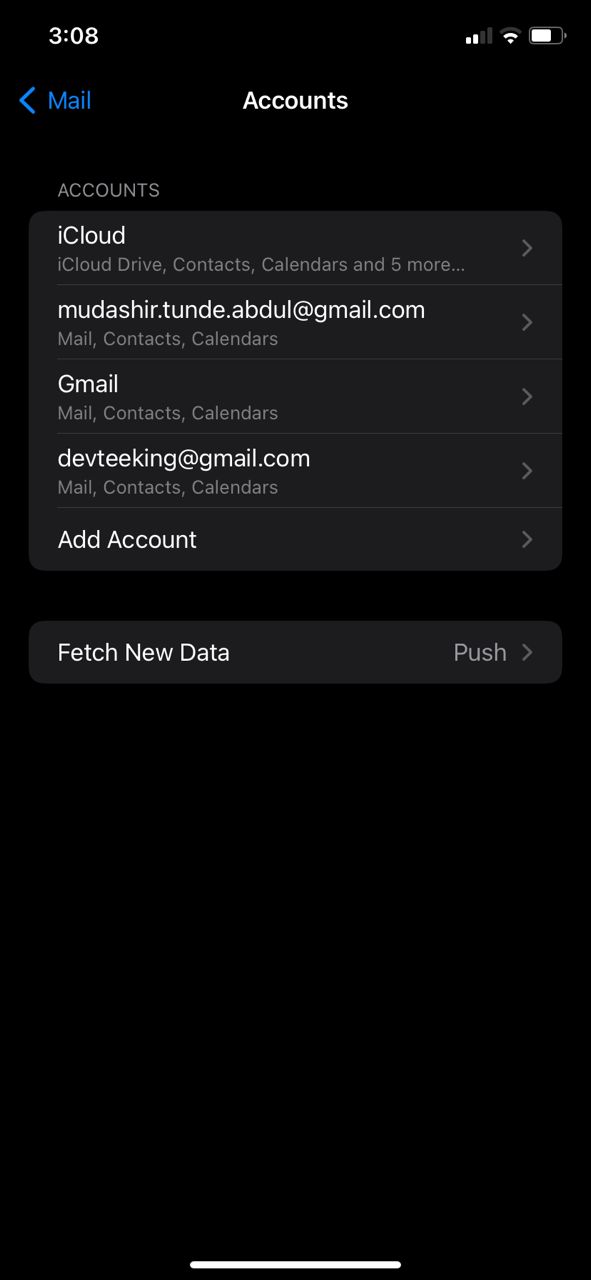
- Click on Accounts to see the list of the already logged in accounts and get access to the button with which you can add a new account.

- Now select Add Account to add a new Buckeye email account.
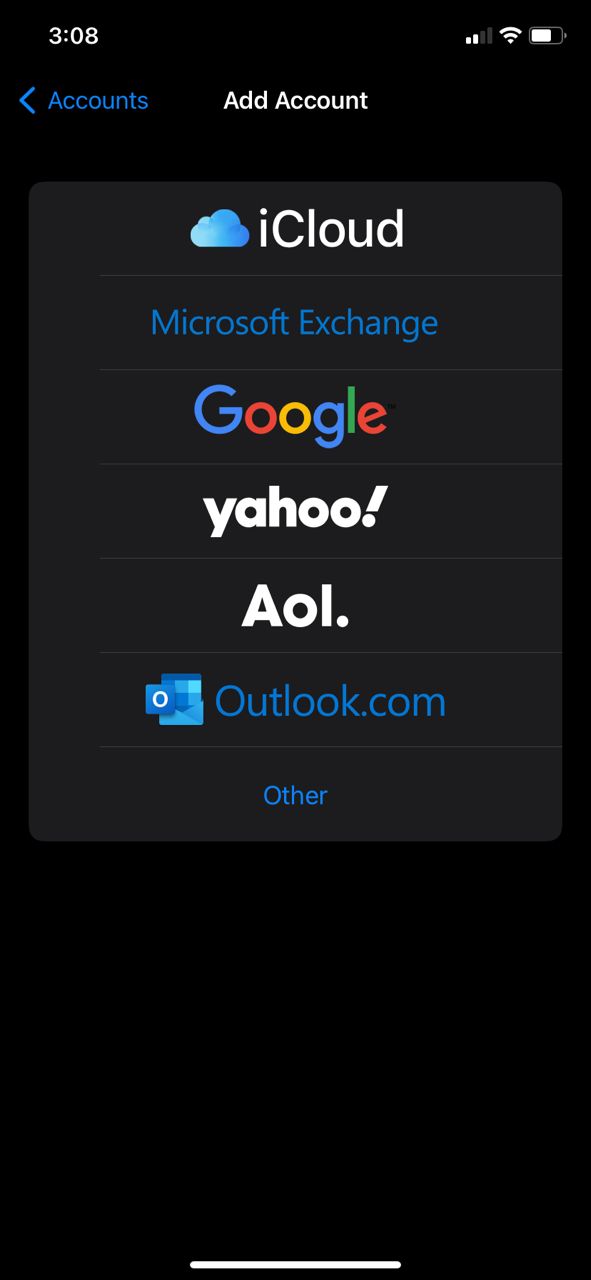
- Now click on Other.
In the next screen, click on Add Mail Account.

- It is now the time to fill in the new account’s details. You definitely would not have to enter the same details seen in the screenshot below. But that tells you how the next screen looks. Of course!
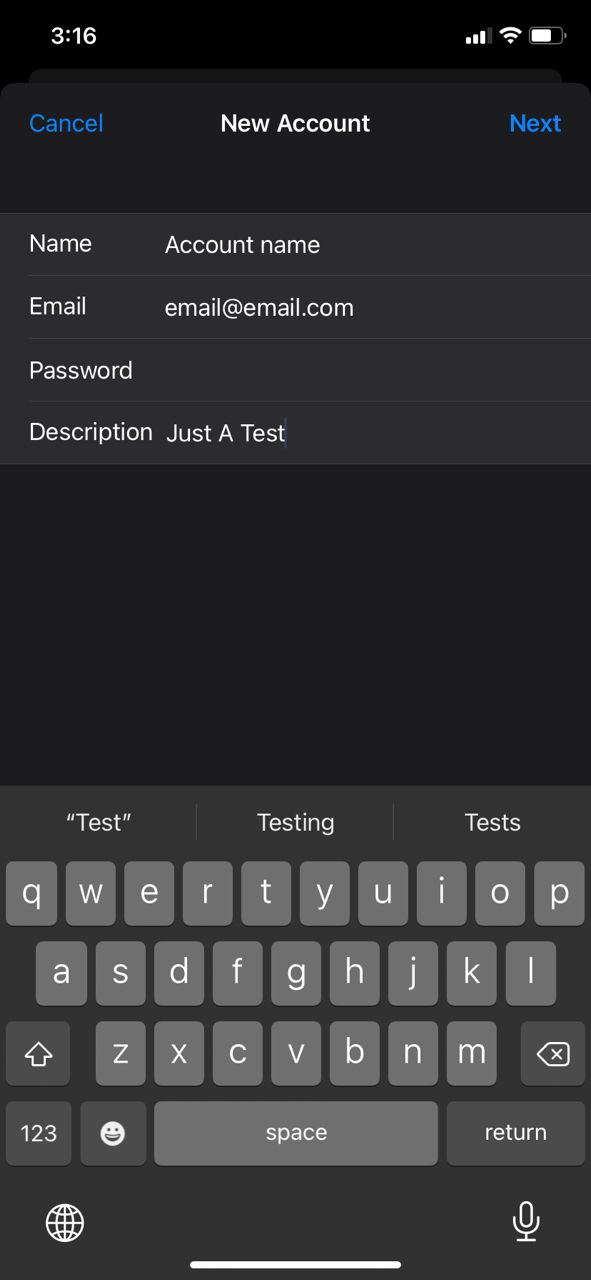
- Now, in the next screen, select POP in the new account header.
- Scroll down to the Incoming Mail Server section, and enter all the relevant details. Do the same for Outgoing Mail Server settings, and then click on Next.
Points to note here: Be sure to type the full email address in the User Name field. Also use the same User Name & Password for both Incoming & Outgoing servers. Incoming Mail Server Host Name and Outgoing Mail Server Host Name are mail.bex.net.
- In the event that you receive a prompt asking you to verify the incoming and outgoing servers – you can click Continue on both cases or tap Details and then click Trust. Then save the changes.
- Now head back and choose the new account you have just created.
- Select SMT Server.
- Check the SMTP settings and click on the Done button.
Below are some constant parameters to note:
- BUCKEYE-EXPRESS.COM’s Outgoing Mail Server Host Name: mail.bex.net.
- User Name: Your full BUCKEYE-EXPRESS.COM email address.
- Password: Your email password.
- Authentication: Same as the password
Use SSL is On. You can also turn it off and use the correct Port number as provided below.
- Outgoing (SMTP) Secure – Port: 465, Security Type: SSL/TLS (Accept all certificates)
- Outgoing (SMTP roaming server) Secure – Port: 587, Security Type: SSL/TLS (Accept all certificates)
- Outgoing (SMTP) – Port: 25, Security Type: None (Accept all certificates)
- Outgoing (SMTP roaming server) Insecure – Port: 587, Security Type: None (Accept all certificates)
Congratulations, buddy! Your Buckeye Email app is all setup and ready for use on your iOS device. You can now start using the app to send and receive email messages effortlessly.
Manual set up of Buckeye email login on Apple Mail
- Launch Mail App from your system.
- Select Mail and then Add Account from the toolbar at the top of the app screen.
- For the known used email accounts, choose the automatic configuration of the email from the list. Alternatively, you can choose Other Mail Account and manually setup the email account.
- Fill in the required fields as described below, and then click Sign In.
- Your name: Whatever you input here represents the name of the sender in email messages that you send from this account. So, enter your real name in full.
- Email address: Your full buckeye-express.com email address
- Password: Your email account password
- The followings will help you complete the settings
- Email Address & User Name: Use your full buckeye-express.com email address
- Password: Use your buckeye-express.com password
- Account Type: IMAP or POP according to preference (IMAP is the default).
- Incoming Mail Server Host Name: mail.bex.net
- Outgoing Mail Server Host Name: mail.bex.net.
- For domains still in transfer or propagation: use the IP Address in place of Incoming & Outgoing Mail Server temporarily
- When you get the Unable to verify account name or password message, simply ignore it.
- Now, click Sign In
- Do not worry. Just ignore the 2 server identity messages, and simply click Continue. Ideally, you can add the certificate to your trust settings to evade seeing this message in the future.
- Select the Mail app and click on Done.
Congratulations! Your Buckeye Email Mail App is all setup and ready for use on your device. You can now start using the app to send and receive email messages effortlessly on your Apple Mail.
Manual set up of Buckeye email login on Microsoft Outlook 2016
- Launch the Microsoft Outlook app.
- Locate File on the top left menu bar and click on it.
- Select Info, and then, Account Settings.
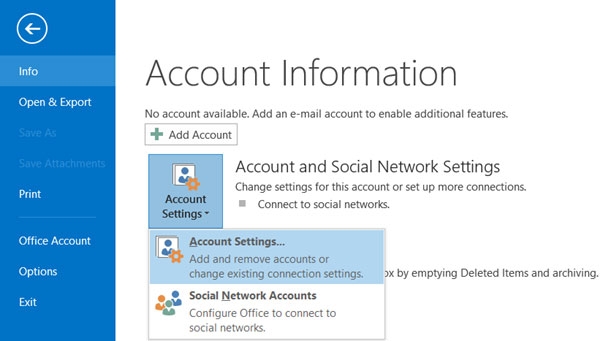
- Select Manual Setup or additional server types, and then click on Next.
- On the next screen, select POP or IMAP, followed by a hit on the Next button.
- Completely fill the required details in all the fields (Select POP or IMAP according to your preference) and then click on More Settings.
- Click on the Outgoing Server tab and make sure the My outgoing server (SMTP) requires authentication checkbox is checked, as well as Use same settings as my incoming mail server.
Select the Advanced tab, and let your settings’ details follow the one given below as the standard for the choice of either POP or IMAP: POP port settings for buckeye-express.com.
- Incoming Port (POP3): 110
- Outgoing Port (SMTP): 25 or 587
- General settings for POP:
- Secure – Port: 995, Security Type: SSL/TLS (Accept all certificates)
- Insecure – Port: 110, Security Type: None (Accept all certificates)
- This server requires an encrypted connection (SSL): Leave it not ticked
- Use the following type of encrypted connection: None
Buckeye Express IMAP port settings:
- Incoming Port: 143
- Outgoing Port: 25
- Secure – Port: 993, Security Type: SSL/TLS (Accept all certificates)
- Insecure – Port: 143, Security Type: None (Accept all certificates:
- This server requires an encrypted connection (SSL): Leave it not ticked
- Use the following type of encrypted connection: None
Note: If you use Secure SSL / TLS Settings, ensure that the “This service requires a secure connection (SSL)” box is checked in both outgoing and incoming mail settings.
Buckeye Express Email general SMTP port settings:
- Outgoing (SMTP) Secure – Port: 465, Security Type: SSL/TLS (Accept all certificates)
- Outgoing (SMTP roaming server) Secure – Port: 587, Security Type: SSL/TLS (Accept all certificates)
- Outgoing (SMTP) – Port: 25, Security Type: None (Accept all certificates)
- Outgoing (SMTP roaming server) Insecure – Port: 587, Security Type: None (Accept all certificates)
- Now, to save these new settings, click the OK button
- Click Next to get to the next screen, and Finish to complete the setup.
Wondering how to easily login on Buckeye Express Email?
Here is how:
- Go to Buckeye Mail Login website using this link
- Enter your Username and Password, check the Stay signed in box if you would like to save your sign in details, and hit the Sign In button.
Departing Thoughts
So that is it, buddy. We hope by now, you know how you can set up your Buckeye Express email login on Android, iOS, Apple Mail, and Microsoft outlook. We gave you different methods so that you can find the one that is easier for you to use. Kindly let us know how you feel about the post.
There are several other incredible guide posts on our website. Be sure to explore as much as the time permits. And we would like to hear from you what your thoughts are about our content.
