
There is hardly anyone who does not love being a part of the seductive Minecraft game. This is one of the best games ever to have launched on the gaming platform. Recently, the developers are thinking to launch its expansion. Although Minecraft does not involve mining and digging, there is a lot more to do. With a variety of animals to farm and pet these animals for making your life easier, one of them is to tame a fox in Minecraft Guide.

Before jumping onto the various aspects and features of the game, let us see what the game is all about. Also, let us explore the various in-depth analysis of the game, what kind of amazing features the game has to offer to its players. Moreover, you need to find the reason why the game is becoming popular among people.
Tame a Fox in Minecraft and Make a New Friend
Can foxes be tamed in Minecraft? Yes, it’s possible to tame foxes in Minecraft. However, it requires a lot of effort and patience at your end. You need to find it in the dark, then only you can tame and breed its offspring. You can even own a large army of foxes. These nocturnal mobs are not only difficult to bring under your control, but also tough to find them.
The first step towards taming foxes in Minecraft comprises locating the habitat of these foxes. For this purpose, you need to visit Taiga biomes. Extensive explorers of the game have surely had it, but those who haven’t will need to find one. After you have arrived there, you have to breed two foxes by using sweet berries. You will find it easily in the Taiga biomes. The offspring are the ones that you can easily tame. For finding your best accomplice in the jungle, this is an important step.
Also, Read: Best Web Scraping Tools
But you will have to face certain difficulties and challenges to breed the foxes instead of other animals while playing the game. The foxes always shy off when you come closer to them. Though, sitting in a crouching position when you are close to them will avoid their fleeing. To breed the foxes in the Minecraft game, you require at least two foxes to come together. Certainly, you need to find out the technique of bringing them together.
The most popular method to bring them closer is throwing food items such as berries, or any other food items in front of them. Eventually, this process will come out as a success as they become tempted to eat those food items thrown away at them. You can even use a lead through a crafted one.
How to Tame a Fox in Minecraft and Make a New Friend?
During the times of combat, you can use the domestic foxes as allies. These foxes are capable of attacking any hostile mob that can potentially cause a threat to you as a player. These hostile mobs would also prevent you from making jumps and acceleration. These foxes are not reliable partners but also can save them from dangerous wolves. Unlike other pets, the foxes that are already tamed, do not follow their masters.
Meaning, you need to carry your box through a lead. You need to tie these foxes to a tree. This will ensure that the foxes won’t run away. You can avoid them running by placing them in areas that are prone to dangerous ravines or lava pits. This will allow you to perform your normal routines in the game like cutting timber or collecting metals from the ore. As the foxes are nocturnal mobs, this can happen only in the night time.
The night time is also perilous as the other monsters roam around this time. But if you have a good fox friend then it is of no worry. These nocturnal mobs are instinctive hunters of the night. They easily prey on fish and track down rabbits that are difficult for you to hunt down.
To make it easier in the Minecraft game, you as a player need to note down a few other important details. The foxes are easy prey for the pack of wolves and will attack them once the foxes are within their proximity. So, to avoid a fight between the two groups, you need to place your foxes somewhere else. The primary job of the foxes will help you to hunt down chickens, and can even jump from long distances. Hence, plan their housing to a safe place to avoid any chaos. This will help you to get the best out of your foxes.
Where to Find Them?
The most important thing about the Minecraft account game is to find out the foxes quickly. So, anyone looking to find them should start their search in the dark. This is because these foxes are nocturnal. It is dangerous during your presence. The newcomers will try to thwart such threats that it won’t become someone’s dinner before they search for their foxes.
You can easily these nocturnal mobs in the taiga biomes during the dark, since they like to hide behind the trees. However, you can look for the foxes in the various kinds of taiga biomes such as snow taiga biomes, giant tree biomes, and taiga. You can locate these foxes even in the villages.
Sometimes you may see the foxes are spawning like cubs. But the color of the fox might differ from the classic one. The classic foxes have classic russets with whitetails while the snow taiga biomes are white in color.
How to Allocate More RAM to the Minecraft Server in 2020?
Below are the two ways through which you can Allocate RAM to the Minecraft Server:
Add more ram to Minecraft Launcher
Allocate RAM to the Minecraft Server in 2020
Step 1. Checking RAM availability
- Click on the Start button on your PC. Go to Settings, and then go to the About section on your computer to check the RAM availability. Click System
- Clicking the About section to check your system’s available RAM on your PC.

Step 2. Navigate the JVM arguments switch
- You need to click the Minecraft Launcher icon twice
- Choose the Launch Options menu.
- Check if the Advanced settings are turned on.
- Pick the specific profile you want to edit.
- Double-check to put the JVM arguments to switch on.
Step 3. Modify the RAM for Minecraft
- A-line text will appear on your screen such as -Xmx1G. You need to alter the 1 to the number of gigabytes you want to increase for allotting it in the Minecraft server.
- Finally, click the save button to enable the changes.

When you have successfully done all these processes, Minecraft will try to use the profile you chose to imply.
How to make concrete in Minecraft: Learn in Easy Steps?

Are you struggling to create concrete blocks in Minecraft? Never worry, this post will make your life easier by clarifying all your doubts and help you make concrete in Minecraft. But before that, why there is the need to build concrete is so important in Minecraft.
You can create thousands of things in Minecraft. For this purpose, you need to have a few material blocks to create houses and structures in Minecraft. One such material to build structures is concrete. But you need to construct it on concrete grounds. Click here how to tame a fox in Minecraft.
Therefore, you require concrete to build structures in Minecraft. Similarly, you should find ways to discover concrete. So, follow the below article to find out more about finding concrete and build structures in the game.
How to make concrete in Minecraft
To build concrete structures in Minecraft, you need to have water and concrete powder. We will deal with the process of how to make concrete powder in Minecraft at a later stage. These two things would mix and the result is concrete. However, concrete powder is difficult to access. You need different materials to create a concrete powder. You need three materials, colors, sand, and rock. However, with too big huge structures, you may need to obtain these materials in large amounts.
Sand:
You need four bits of sand to create eight bits of concrete powder. Hence, you need large amounts of sand to create a concrete powder. Though finding sand on the island is an easy task and you can get it easily in Minecraft. You can find sands in the deserts also.
Find a Gravel:
Four bits of rock is enough to build eight bits of concrete powder. You can find large amounts of rock in Gravel Mountain.
Color:
If you want to create one bit of concrete powder then you need one bit of color. Are you thinking about how to create colored concrete in Minecraft? You can use a simple color to extract a perfect response. This is done to create a shaded concrete in Minecraft. There are as many 16 types of different colors available in Minecraft. To create white concrete structures in Minecraft, you need white color. However, you can mix to get two colors.
Art concrete powder:
To prepare eight bits of concrete powder, you need to have one bit of color, four bits of rock, and four bits of sand.
- Prepare this mixture on a table.
- Locate sand in the right, top, and in the base.
- Place the rock in all the other corners. Locate the color on the inside.
- Choose the color of your choice to get a colored concrete in Minecraft.
- If you want to change the color, you will have to wait for a longer duration.
It is difficult to create concrete buildings with concrete powder. The best practice is to use concrete and water to an optimal level. When the concrete powder gets in contact with water, you will get concrete cement.
You can even use a pickaxe to collect concrete powder and then put some water to get concrete cement.
Bring all the concrete powder to one place and pour water from above the powder.
The concrete is available in 16 different colors while you create the blocks. So, the concrete powder should get in contact with the structure. The only method to transform into a solid-state by pouring the water from above or by a water bottle. At first, it becomes solid then changes into a concrete structure while you drop water onto it.
To make concrete powder in Minecraft, you should have eight types of unique materials and a color that is available easily. Before you create a concrete structure, you need to obtain a concrete powder. You need to bring these below materials into one place:
- 1 Dye
- 4 Gravel
- 4 Sand
You can also make eight structures from the above materials and the color. Now you can use this mixture to make concrete structures.
Once you have learned how to make concrete powder in Minecraft, you can create any amount of cement you desire. If you want to create enormous amounts of cement then you need to put the powder in front of the water source. Or simply, just drop a small amount of water into the cement. Locate the powder similarly as you would do create multiple cement blocks in the game. This is the easiest way to transform concrete powder into solid cement blocks.
How to Update Minecraft Windows 10 Edition to Latest Version?

To run your Minecraft smoothly and without any glitch, it’s necessary to upgrade to the windows 10 Minecraft latest version. This will ensure stability to the game and provide you with the latest content available regularly. Though, the Minecraft Windows 10 edition will update by itself whenever you launch the game. However, Minecraft Windows 10 edition updates by itself when launched. But sometimes, this does not happen no matter the number of times you restart the game. So, the below points will guide how to update the latest Minecraft version Windows 10, and other essential things about the game.
How to Update Minecraft Windows 10 Edition to Latest Version?
You need to follow the points to check for updates manually.
- Click on the Start Menu option.
- Open the search option and type Microsoft Store.
- When you open Microsoft Store, you should see a triple dot icon top right-hand corner of your screen. Click on the dotted line and it enables an option Download and Updates.

- Click on the updates menu option.

- When you click on the “Get updates” button, it will enable the Microsoft Store to check for automatic updates if available. If the updates are available then it will automatically install the latest version for all applications including the latest Minecraft version Windows 10.
- After successful installation of all the updates, a message option will pop on your screen, “You’re good to go”. You now have successfully installed the Windows 10 Minecraft update. Your Minecraft for Windows 10 should now have the latest updates installed. If you are searching for how to create a free premium Minecraft account then click here for creating a free premium Minecraft account.
A Perfect Way to Use Elytra in Minecraft

To glide in the air just like flying in the Minecraft game, you need to use elytra in Minecraft and that can be achieved by following the step-by-step instructions below.
Elytra in Minecraft
Background
If you have ever visited the End city once and discovered elytra, you can easily wear it and fly around. However, you need to learn how to use elytra for an optimal experience.
Materials you require:
Elytra
The first step would require you to unlock your inventory
You should wear the elytra to glide yourself in the game. For this purpose, you need to open up your inventory. There are various methods to showcase your inventory and it depends on which version of Minecraft you are using:
- You need to press the E button on your keyboard if you have Java Edition (PC/Mac). This will bring up your inventory menu option.
- If you are using the Pocket Edition, just press the three dots button to enable your inventory menu.
- Press the Y button if you are an Xbox 360 or Xbox One user to enable the inventory option.
- You need to tap the triangle button p3 in PS3 or PS4 through your PS controller to bring up the inventory menu.
- Tap the X button option to come up with the inventory menu for Wii users.
- Tap the X button for Nintendo switch users.
- To update Minecraft in Windows 10 Edition, you need to press the E button key.
- You should press the E button to showcase the inventory menu in Education Edition.
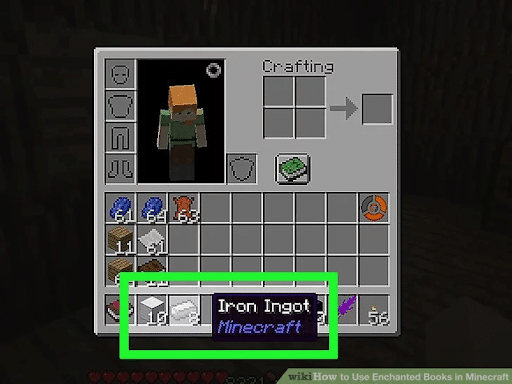
How to Use Enchanted Books in Minecraft with Creative Mode?

Minecraft has a lot of things to offer to explore and combat difficult challenges. One such important aspect is Enchanted books. This will help you fight the odds of the game and discover various important areas of the game. You need to have lapis lazuli and vast experience for creating an enchanted book in Minecraft. Enchanted books will help you to increase your strength and to obtain the necessary resources to combat tough situations.
How to Use Enchanted Books in Minecraft with Creative Mode
1st Step: How to Create an Enchanted Book

Collect important items – The first step would require you should acquire few items:
- Crafting table – You need four wooden crates. This item you can get from a single block of wood.
- Book–Acquire leather and three pieces of paper from sugarcane.
- Enchanting table–Here you need a book, two diamonds, and 4 pieces of wooden blocks of obsidian.

Bring upon Inventory –The crafting materials are available here for your use. For Pocket Edition Minecraft account users, you need to tap in the three-dotted line … menu to bring up your inventory menu.

Craft a crafting table –You need four blocks of woods to perform this action. This is available by placing a single block of wood in the crafting grid. If you are using a desktop version, then you need to use the click and drag option for every wooden block in the crafting grid of two by two on above of your inventory option.
For the Pocket Edition users, just tap above on the inventory menu option and press the crafting table menu. This might look like a box having various lines in it. While you are on the console, just press the X button (Crafting) to select a single piece of the wooden block.
- Keep your crafting table in the ground – To complete this action, you should pick the Hotbar from the bottom of the screen. Open your inventory menu and quickly replace an item in the Hotbar. You will get this item in the crafting table.
- Open the Crafting Table – When you click on the crafting table, it will showcase a grid measuring a three-by-three grid. Besides this, it will also show the contents of your inventory.
Craft a book –To complete this action, you need to keep all three pieces of sugar cane in the middle row of the crafting grid. Then you need to pick the resulting paper, place all the paper pieces in an L-shape towards the top-left corner in the crafting grid. Always remember to keep your leather in the top-middle box.

This will enable you to fill the L-shape. If you are using Minecraft in the Pocket Edition, you need to press an icon that has a book symbol. You will find this icon on the left side of your screen. You need to click the book icon once on the right-hand side of your screen. For console users, you need to choose the book icon available in the paper section. You can navigate this item on the “Decorations” tab.
- Design an enchanting table–To create an enchanting table, you need to place the book in the top middlebox, a diamond in both the middle left and right boxes, and obsidian in the underneath the bottom and in the center. This will showcase the enchanting table menu to appear on the right side of the designer grid. Console players need to choose the enchanting table from the crafting area available in the “Structures” tab.
- Keep the enchanting table on the surface –You need to follow the same process as you did in the earlier step while placing the crafting table.
Enchanting Table opening – This will create an opportunity to showcase one space where you can easily place your book.

- Keep the book on the table – To complete this action, you need to simply use the drag and drop function. Just click and drag into the vacant space (PC). For Pocket Edition users, you need to press the book located on the left side of your screen and keep it on the table. Console users, choose the book from your inventory.
- Choose an Enchantment – Depending on the level of the game you are playing right now, Minecraft will allow you to place the books. However, if you want to apply it, you need to choose an enchantment. The Enchantments are available in random motion, so it won’t allow choosing a specific enchantment.
Choose the Book – Choosing a book will allow you to keep it in your inventory. After receiving the book, you can now use it as an item. Pocket Edition users should click double times to add it to your inventory.
Part – 2: How to Create an Enchanting Item in Creative Mode?
Collect the Important Materials for the Anvil
If you have an anvil, it will help you to use the enchanting book as a material. However, to create the anvil, you require the below items:
- Iron Blocks – To create an iron structure, you need nine quantities of iron bars. This means, overall you require twenty-seven bars of iron.
- Iron bars – One more iron bar will add up to a total of thirty-one iron bars. Also, you can get more iron bars from iron ore. These are grey stones in color having spots like orange-brown.
How To Make Green Dye In Minecraft & What Are Its Best Uses?
You can create multiple colors of your choice in Minecraft. So, follow the below instructions to make Green Dye in Minecraft.

Make Green Dye In Minecraft
You need a single block of cactus to create a green dye in Minecraft.
Use any tools or with your bare hands to break the cactus.
1: Bring up the furnace menu.
2: Put fuel into the furnace.
3: Then mix a few other materials to create the Green Dye
Mix the fuel and add the cactus block into the furnace. Within a few seconds, you will see the material is being cooked by the rising flames. Cooking the cactus properly will create your green dye that will appear in a box located to your right.

Step 4: Now you can add this material to your inventory.
Best ways to use a Green Dye in Minecraft
Once you have learned how to make green dye in Minecraft, you can use it for specific purposes:
- You can use it to color the skin of the ships.
- For coloring the collars of the tamed foxes.
- You can even use it to color multiple items such as beds, glass, shaulkers boxes, armors, and terracotta.
- If you mix gunpowder and green color, it can get you a firework star.
- Adding patterns to banners.
- You can use color shaulkers in the editions of Education and Bedrock.
- Even you can create a concrete powder. Click here for how to make concrete in Minecraft.
- You can use it to create glow sticks and balloons.
How To Make A Lantern In Minecraft And Where Do You Place Them?
At first, you need to get the Minecraft lantern recipe and then create it by going to the crafting option.
Your screen should look like this, 3×3 crafting grid:

3×3 crafting area
Addition of Materials to create a Lantern
In the crafting menu option, you will see a crafting area that measures like a 3×3 crafting grid. For this purpose, you need to keep one torch and eight iron nuggets in the grid. But remember that you should place the iron nuggets and the torch in the same position as shown in the picture below. Place three iron nuggets in the first row. The second row should consist of one iron nugget in the first box, one torch in the second, and one iron nugget in the third box. You should include three iron nuggets in the third row to make a lantern in Minecraft.

Filling the area with the correct option will make your lantern appear in the box to your right.
Placing the Lantern in the inventory

After creating the lantern successfully by using the lantern recipe Minecraft, you can now move the material to your inventory.